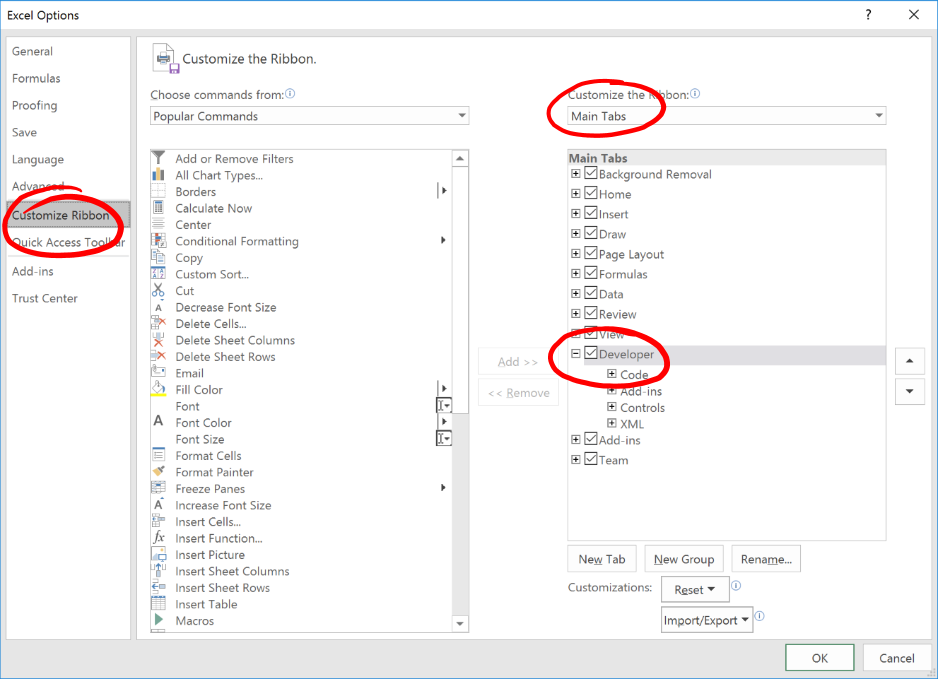
- 1. Enable the Developer tool menu in Microsoft Excel®
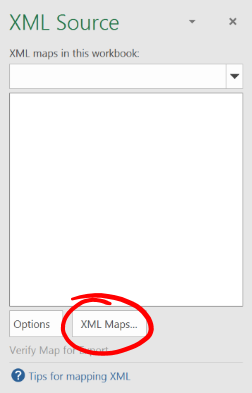
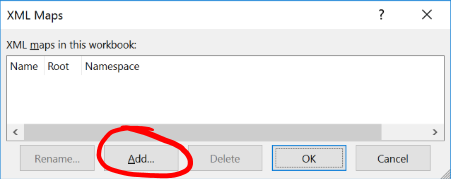
- 2. Install the XML schema for the import and export of XML files
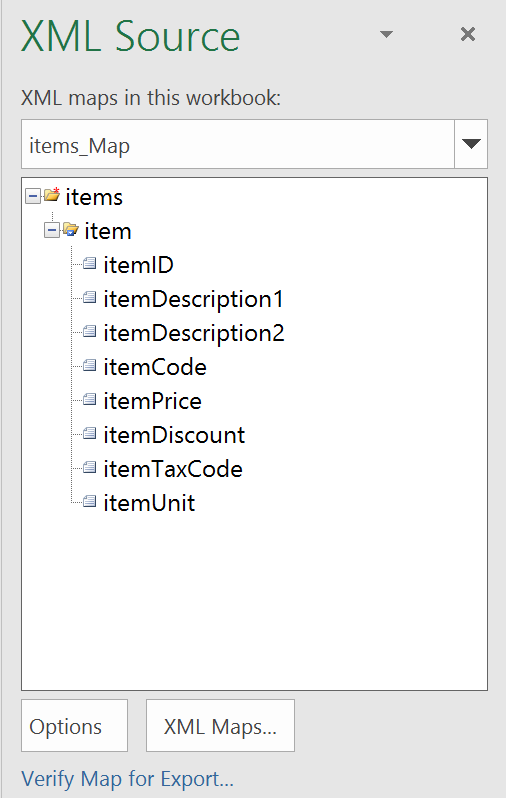
- 3. Use the XML scheme in a workbook to import data into the Crazy Document app
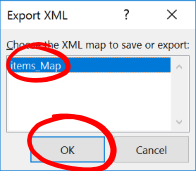
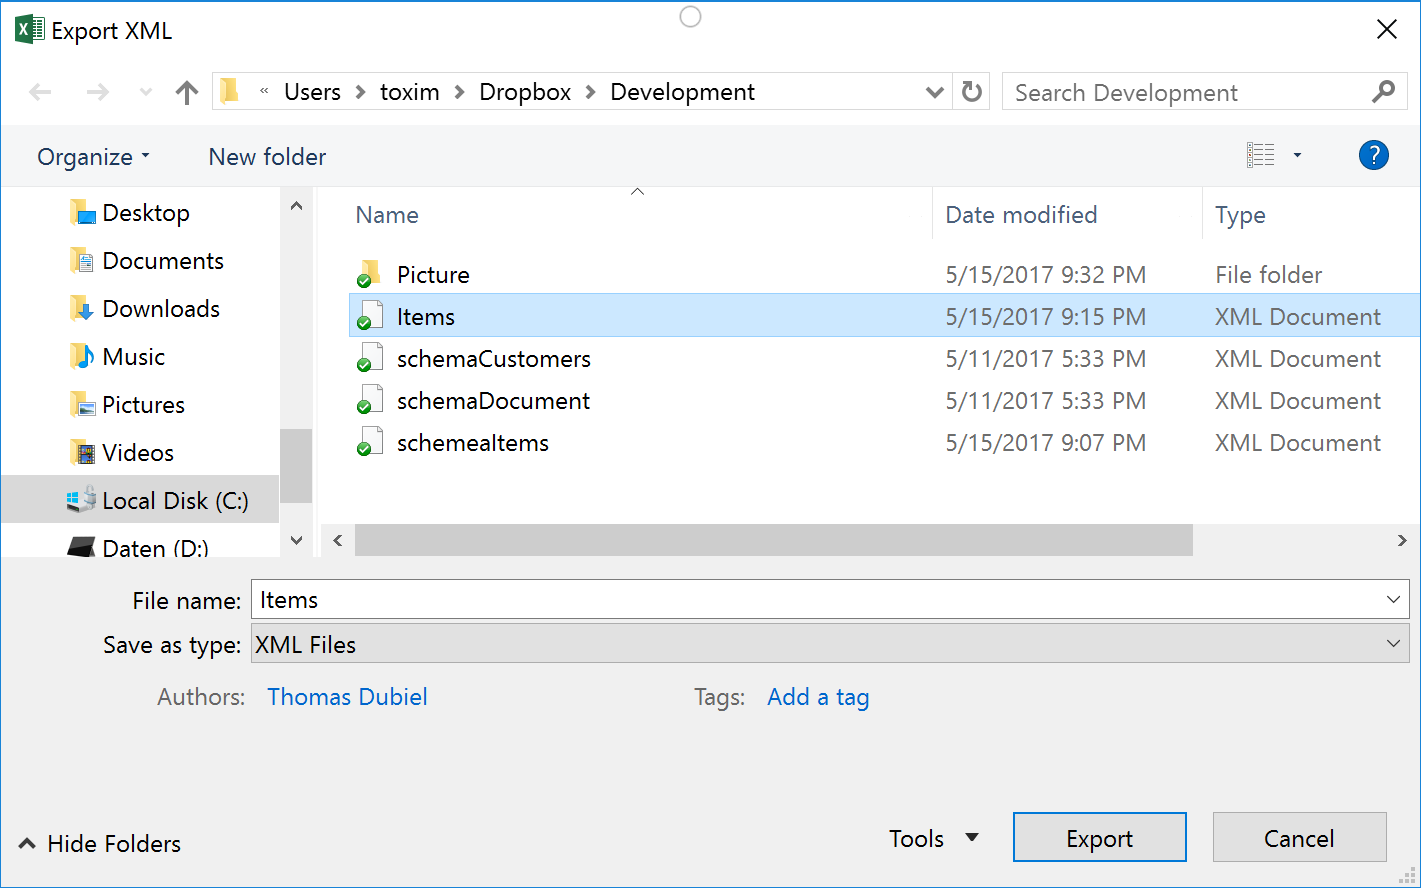
- 4. Export documents from the app
- 5. Customize the XML structure to your own requirements
Crazy Document Wiki
Inventory Importing and Exporting
Crazy Beleg offers the possibility to import customer and artile data. It is also possible to export documents, created in the app, to process them further in other programs. The exchange format for both import and export is an XML file.
The simplest form of data exchange is to export the data from an Microsoft Excel® file. Unfortunately, Microsoft Excel® does not provide a direct way to save a table as a pure XML file. The necessary steps are summarized in this wiki. All screenshots comes from Microsoft Office® 365. The individual points may slightly differ in different versions, but the general procedure is the following:
Here are the detailed instructions:
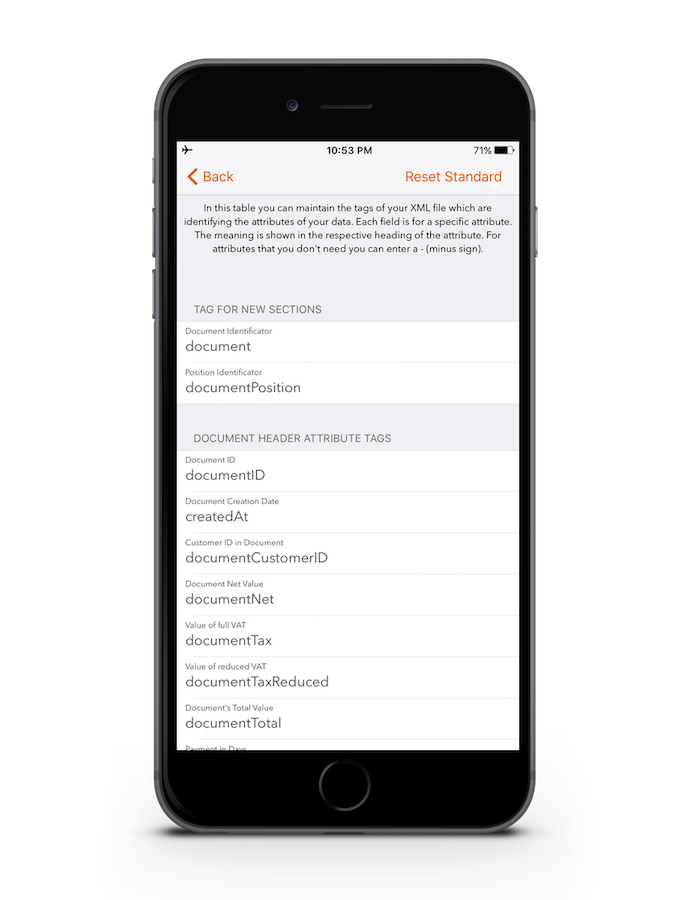
If the developer tools do not appear in the menu bar, this menu needs to be enabled. To enable the menu do the following steps: You will see the Options menu In order to import or export data from the Crazy Document app, you need a scheme. Please download the following ZIP file and extract and save the files on your local computer. Import all XML Schemas as data source in Microsoft Excel: Now you have imported the two XML schemas in your Microsoft Excel workbook. You should save your workbook for future projects. You can use a copy of this workbook. You have a workbook that you want to use as the data source to import the data into the Crazy Document app. In my example, I use the following data: You have entered a document completely and want to close it now. To this purpose, the app offers several possibilities which you can reach via the action button in a displayed document: This action saves only the current document. No data is printed or exported to the Dropbox. Save this action for later editing. This action will give you a preview of how your printed document will look like. The document is automatically saved. To complete a document, tap the printer button at the top right. A print dialog is displayed in which you can select the correct output channel for you. On the one hand, this can be an AirPrint-enabled printer that is connected to your device or another app that takes the printout for you. It can also be apps from printer manufacturers, which offer the possibility to receive a document to be printed over the document exchange. Select an available item from the list. If the app is able to transfer the document or print to an AirPrint printer, the document is marked as processed and an XML as well as an PDF file are automatically saved in your Dropbox. This action automatically saves the document and displays a preview. From here you can print the document as described above or save it as a PDF in your Dropbox. The data is not exported as an XML file. This action is used to print a document again without changing the data. This action automatically saves the document and saves a new XML file in the Dropbox. There is no printout or export of the PDF file. For the import of the data, a fixed structure and a clear identification is required to be successfully processed by the app. Not always these unique names (tags) fit your needs. For this reason the app provides a possibility to map the tags to your requirements. You can find it in Settings -> Section Import and Export Options -> XML mapping costomization. Here you can change all tags for the customer, item and document data. The mapping for the document is shown here in the example. You can enter the tags to be used in the XML file. The short description can be found in the description of the structure. Please note that the tags are Case Sensitive!Enable the developer tool menu in Microsoft Excel

Install the XML scheme for the Import and Export of XML files

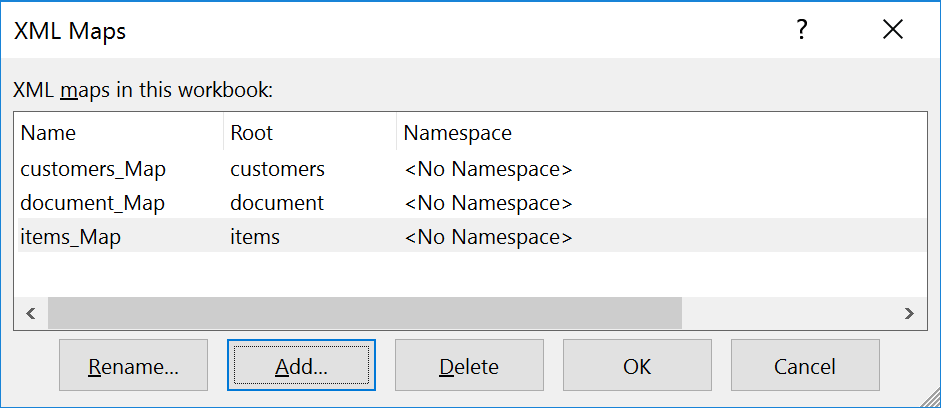
Use the XML Scheme in a workbook to import data into the Crazy Documents App
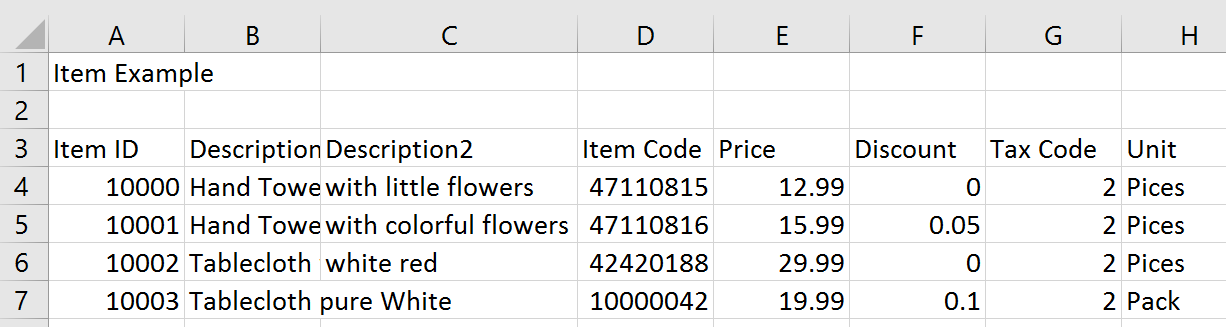
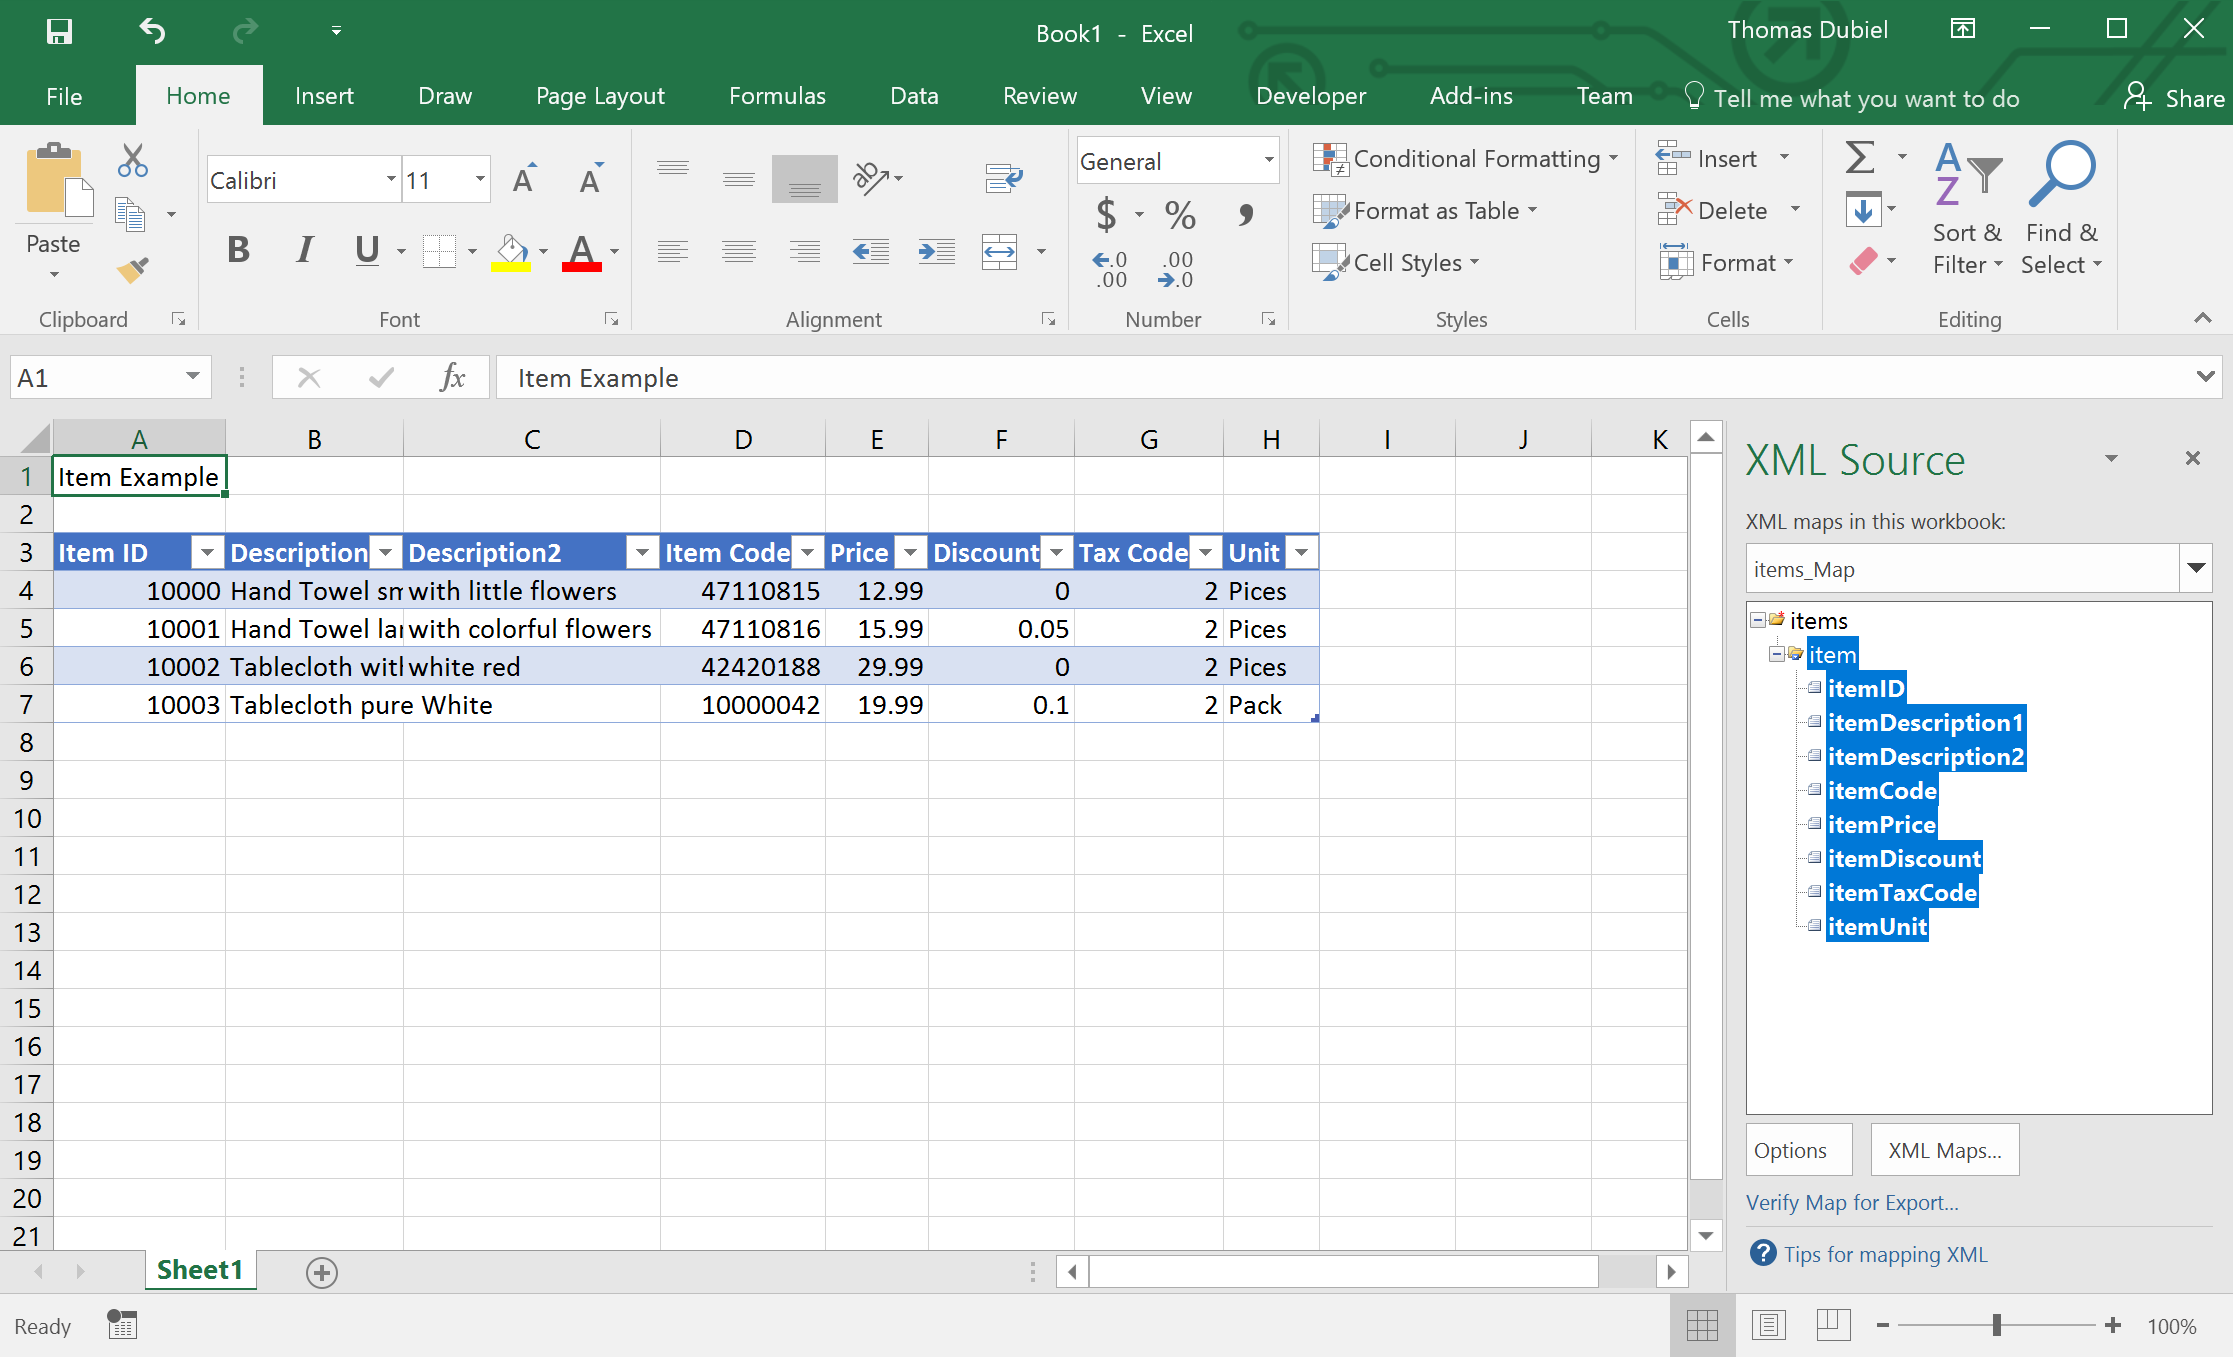

Import of master data


Export documents from the app
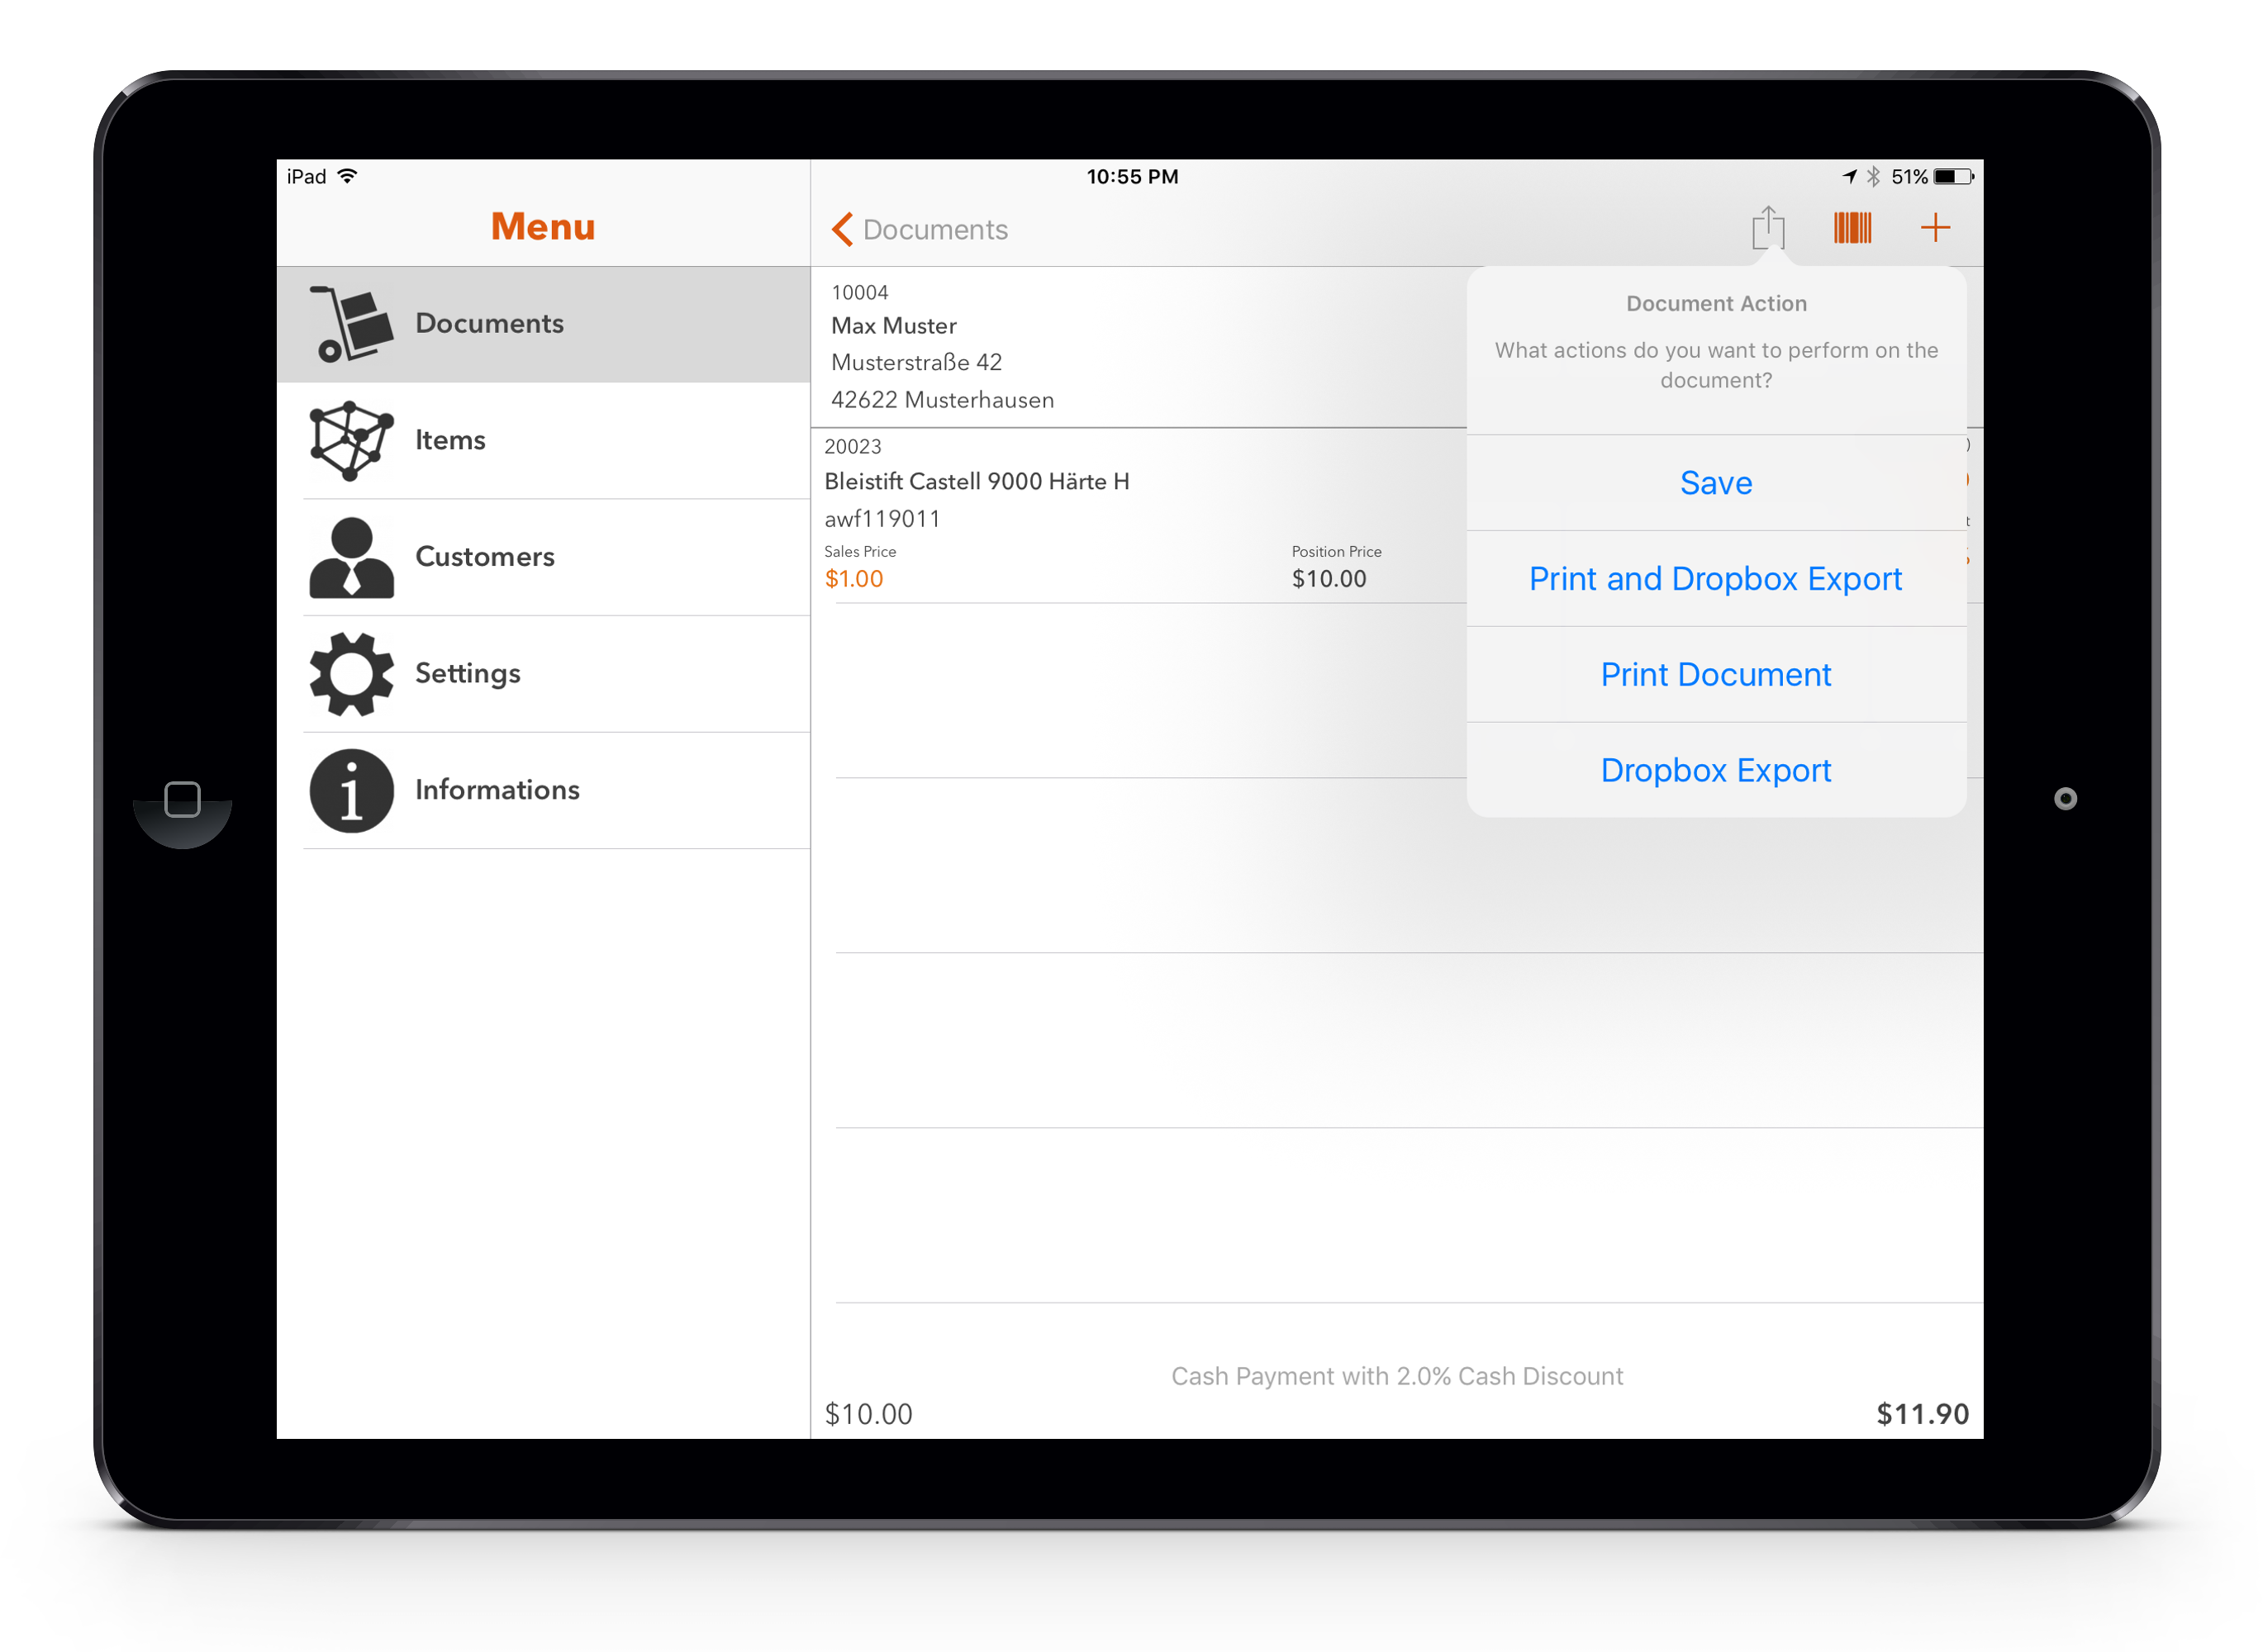
Save a document without additional action
Print a document and export XML and PDF to Dropbox
Print document / PDF only
Export a document only
Structure of the XML file of a document
Customize the XML structure to your own requirements